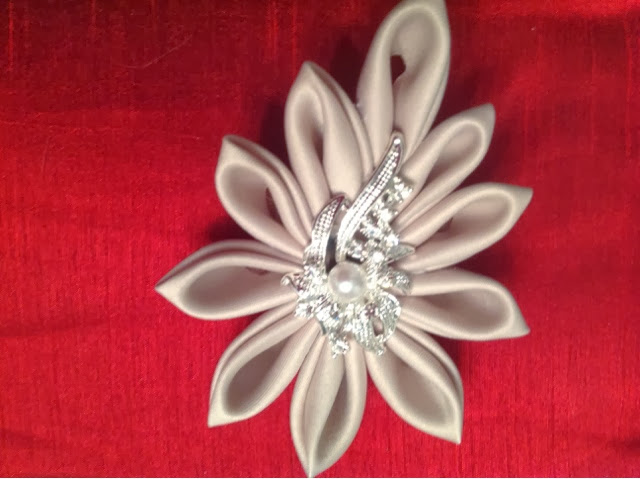
Wednesday, February 19, 2014

Next steps

I am leaving for Rwanda next week and on my return trip it turns out that I will be able to visit with Jami for a few hours.  I have a stop over in Amsterdam, so she is planning on taking the train to Amsterdam from Paris and visit with me on my layover.  So that means I have to get her coat done before I leave.  I guess it is good that I work pretty well under deadlines!  I have been working fast and furious over the past couple of days - with trips to the thrift store with Traci, dinner out with my girls, and a few other things in between.  I still learning about this blogging thing, so I forget to take photos sometimes, but here is what I have for next steps with this coat.  
After I cut it out I cut out the lining and the thinsolate.  Thinsolate is a very thin layer of insulation that looks like batting, although it is a different material than batting I believe.  It is great to add a little warmth coats and jackets.  

The next thing was to iron on the interfacing on the body of the coat.  As you might imagine I like to look at the inside of garments.  When I have examined the inside of wool coats, there is often a layer of a knit looking interfacing, so I thought it would be good to add that to this coat.  It gives the fabric even more stability and makes the wool smooth.  The only problem was that there are small holes in this interfacing and when it melted it got all over my iron.  
You can see it in photo - it is kind of see through and with small holes.  So just a warning.  If you use this kind of interfacing be sure and use a pressing cloth.  It takes much longer, but saves cleaning the iron later.  
I added more interfacing to the front lapel area and did what is called a "pad stitch".  You are supposed to stitch with it already rolled the way that it will eventually lay so that all the layers will lay correctly.  
I rolled the collar around my pressing ham and pinned it before I did the pad stitching.  
Sorry,  I thought this photo showed it with stitching and I don't know how to delete a photo on this app.  Anyone??
Pockets were made next.  I think I will sew them on by hand.  This is a technique that I learned at a sewing class I took in January.  Most of this I did by machine, but the flaps will be done by hand.  
Front sewn together at shoulders and side seams.
Back.   This is about as far as I got yesterday.  What fun.  It is not often that I get to create something from scratch.  Most of what I do is alterations.  So this is a fun project especially since it is for my sweet daughter.


Friday, February 14, 2014

A Coat for Jami

In our family we draw names with our adult kids for Christmas.  This year I got Jami's name.  After much discussion she decided that she wanted me to make her a coat.  She got online and found one that she liked.  Here are a couple of photos of the one I am attempting to make:
The front is a boxy, double breasted style. 
The back has a gray panel at the shoulders. 


Sewing I do well, pattern making - not so much (that will probably be the next classes I will take) so I needed to find a pattern that was similar to the coat she wants.  I found a vintage pattern (Vogue which are not my favorite) on ebay and ordered it.  

This is not double breasted, but I think I can modify the pattern to accomodate that.  I ordered black wool, with charcoal gray for the back.  Jami decided she wants the upper collar to be gray too - like the view in the middle of the pattern envelope.  Here is the fabric:
Melton coating wool.

Before I started cutting I had to get some measurements from Jami.  Jami, my dear daughter, currently lives in Paris, so I can't measure her for this coat.  For some projects, especially ones that use expensive fabrics, or will have fitting challenges making what is called a "muslin" is a good idea  Basically this is just a mock up of the garment made with inexpensive "muslin" fabric, hense the term "muslin".   But since Jami is out of the country it wouldn't help to make a muslin since she can't try it on.  So I got on facetime with her and she put on a coat on that she likes and measured (in centimenters since that is the only tape measures they have in France) around the coat with the fit that she wants.  Hopefully that will work.  If not - I will have to alter it this summer when she is home.   I then modified the pattern the best I knew how.  The pattern was too big, so I had to adjust for that too.  
Bringing in the shoulders and sides. 

This Vogue coat had a two piece sleeve with a seam down the middle.  I wanted a two piece sleeve that is a normal coat sleeve with the seam at the elbow area.  I found an old article in Threads magazine on how to make a one piece sleeve into a two piece sleeve.  Here is a link:  

http://coatsewalong.blogspot.com/2008/07/drafting-2-piece-sleeve-using-one-piece.html.

Gotta love the internet.  Pattern was drafted and I was on my way.  


I plan to use interfacing to give the wool more body, and Jami wants me to put Thinsulate in the lining - so this should be a VERY warm coat.    That is as far as I got today.  Sewing to come.....

Saturday, February 1, 2014

Learning to Make Kanzashi Flowers.

I love to read blogs.  All kinds.  I subscribe to a couple of blogs and pop in on a few more once in awhile.  I follow one from a fellow sewer that I enjoy.  What a great way to share with the world your opinions, your talents and whatever else is on your mind.  It is also a great way to learn things.

So the question is - should I start a blog?  Would anyone be interested?  Who knows - but if nothing else it will be a good place to archive things that interest me,  events that happen in my sewing adventures, photos of things that I have done.  Maybe my great, great grandchildren will be interested someday.  In fact I would be very interested in what my great great grandparents were thinking and doing with their lives, so here goes.

Yesterday was a fun day of creating.  I have been making wedding belts and sashes as well as hair pieces all winter since that is my "not so busy" season.  I have been selling them on Etsy and in the bridal shop that I work for.  So I am constantly looking for ideas on different flowers, and arrangements.  I was looking at etsy and found this Japanese flower art called Kanzashi.  They are folded fabric flowers that are absolutely beautiful.  So I decided to see if I could figure out how to make them.  Off to youtube I went.  There were lots of videos to choose from - many were in another language, but I could follow along just fine.  So here are a few of the flowers I learned to make.